

How To Draw On A Path In Photoshop

Create Type On A Path In Photoshop
In this tutorial, we'll learn how to add blazon along a path in Photoshop! I'll be using Photoshop CS6 here merely this tutorial is as well fully compatible with Photoshop CC. If you're using Photoshop CS5 or earlier, yous'll want to check out the previous version of this tutorial.
To add type to a path, nosotros offset need a path, and Photoshop gives united states several ways to draw one.
Nosotros tin employ a basic shape tool like the Rectangle Tool or the Ellipse Tool, nosotros tin create a path from custom shapes, and we can describe a freeform path using the Pen Tool.
How you draw your path makes no deviation every bit far as how nosotros go about adding text to it because a path is a path no matter how it was created, and the steps for adding type to a path are always the aforementioned. Allow's see how it works!
Here'south the image I'll be using for this tutorial which was downloaded from Adobe Stock. I'grand going to employ a path to add some text around the golf ball:
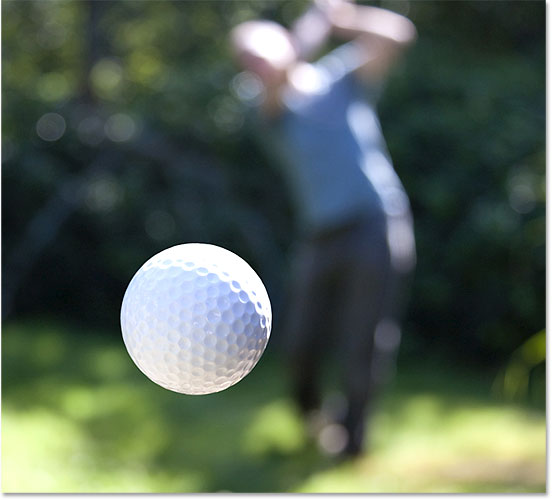
The original prototype.
Allow's become started!
How To Add Type On A Path In Photoshop
Stride 1: Select The Ellipse Tool
As I mentioned, the steps for calculation blazon along a path are the same no thing which tool you used to create the path. So for this tutorial, we'll keep things simple. To draw a path around the golf ball, I'll use the Ellipse Tool, one of Photoshop's bones shape tools. Yous tin larn more about drawing shapes in our How To Describe Vector Shapes in Photoshop tutorial.
By default, the Ellipse Tool is nested behind the Rectangle Tool in the Tools panel. To select information technology, I'll right-click (Win) / Control-click (Mac) on the Rectangle Tool, then I'll choose the Ellipse Tool from the fly-out carte:

Selecting the Ellipse Tool in the Tools console.
Step ii: Change The Tool Mode To "Path"
With the Ellipse Tool selected, the Options Bar along the top of the screen changes to show us various options for working with the tool. Nigh the far left of the Options Bar is the Tool Fashion option. Past default, it'south set to Shape. Photoshop actually gives us three different types of shapes that nosotros can draw—vector shapes, paths, and pixel-based shapes. We want to depict a path, so I'll modify the Tool Mode option from Shape to Path:

Changing the mode for the Ellipse Tool to Path.
Learn more than: Drawing Vector Shapes vs Pixel Shapes in Photoshop
Step iii: Describe Your Path
To draw the path, I'll click and hold my mouse button downwards in the center of the golf game ball. Then, I'll press and concur Shift+Alt (Win) / Shift+Option (Mac) on my keyboard and begin dragging outward from the center. Holding the Shift central down as I drag with the Ellipse Tool forces the shape of the path into a perfect circle, while the Alt (Win) / Pick (Mac) central lets me draw the path outward from the spot where I clicked.
I'll continue dragging outward from the eye until the path is large enough to surround the ball. If y'all demand to reposition a path as yous're drawing it, press and hold the spacebar on your keyboard, elevate with your mouse to move the path into position, and and then release your spacebar and proceed drawing.
When I'm happy with how the path looks, I'll release my Shift key and the Alt (Win) / Option (Mac) fundamental, then I'll release my mouse button (information technology'south important to release the keys start, then the mouse button, or you'll become unexpected results). Here, we meet the path appearing as a thin outline around the ball:

A path has been added around the golf brawl.
Stride 4: Select The Type Tool
With our path drawn, we're prepare to add our text. Select the Blazon Tool from the Tools panel:

Selecting the Blazon Tool.
Stride 5: Choose Your Font
Choose your font settings from the Options Bar. For my image, I'll use Futura Condensed Medium fix to xxx pt, but y'all tin can use any works best for yous:

Setting the font options in the Options Bar.
I also have my Text Alignment option set to Left and my type color fix to white:
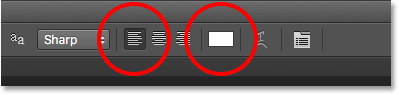
The Text Alignment and Colour options.
Step vi: Motion The Cursor Over The Path
Motility the Blazon Tool directly over the path. The cursor will change to an I-axle with a dotted wavy line through it. This tells usa nosotros're about to add text directly to the path itself:

The dotted wavy line tells us we're adding text to the path.
Step 7: Click On The Path And Add Your Type
Click anywhere along the path and begin adding your text. The spot you click on is where the text will begin, and equally you lot continue typing, the text follows the direction of the path. Don't worry if you've clicked on the wrong spot. Every bit nosotros'll encounter in a moment, we tin hands move the text around on the path when we're washed:

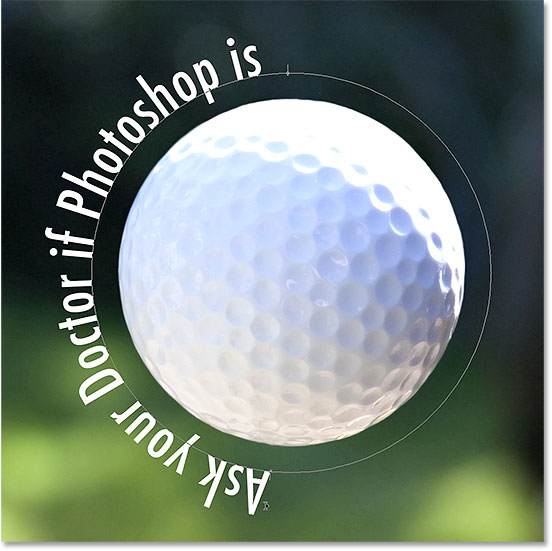
The text is flowing along the shape of the circumvolve.
When you're done adding your text, click the checkmark in the Options Bar to take information technology:
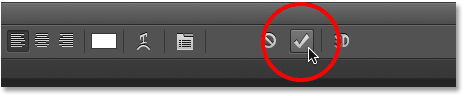
Clicking the checkmark.
The text is at present added to the path, although in my instance information technology'southward on a flake of a weird angle, only we'll fix that next. If your path disappeared on you when you clicked the checkmark and all you lot're seeing at present is the text itself, don't worry. The path will re-appear when we movement on to the adjacent step:

The text is following the path but needs to be repositioned.
Step 8: Select The Path Selection Tool
To reposition your text forth the path, choose the Path Selection Tool from the Tools console:

Switching to the Path Pick Tool.
Pace nine: Reposition The Text
Motility the Path Selection Tool'due south cursor anywhere over superlative of your text. You'll encounter the cursor alter from a blackness arrow into an I-beam with a small-scale arrow on the side of it pointing left or right. Simply click on your text and drag it back and forth along the path with your mouse. Here, I'thousand dragging my text clockwise around the circle:
Movement the Path Choice Tool over your text, and then click and drag information technology along the path.
Watch what happens, though, if I drag my text too far. Some of it gets cut off at the end:
Dragging the text too far resulted in the end being cut off.
The end was cut off considering I moved the text beyond the visible text area on the path. To fix the problem, look for a small circle on the path at the spot where the text is beingness cut off. The circle marks the end of the visible area:
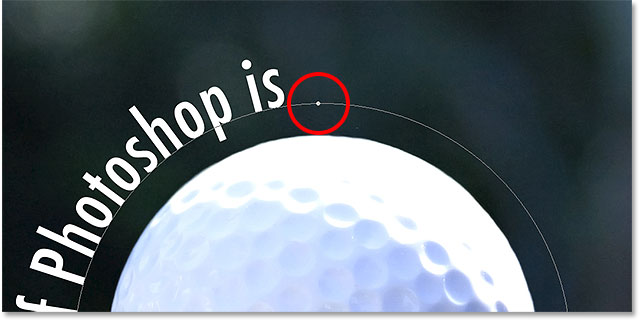
Look for a small circle where the text gets cut off.
Simply click on the circumvolve with the Path Selection Tool and elevate it farther down the path until the rest of your text re-appears:

Dragging the circle clockwise along the path to reveal the end of the text that was cut off.
Flipping The Text Over The Path
Every bit you're dragging your text forth the path, be careful not to accidentally drag across the path. If you lot do, the text will flip to the other side and reverse management:

Dragging beyond the path flips and reverses the text.
Depending on the effect you're going for, flipping and reversing the text like this may be what you wanted to do (it's actually a characteristic, not a glitch). Just if you didn't practise information technology on purpose, simply drag back across the path with the Path Selection Tool. Your text will flip dorsum over to the original side, and information technology volition revert back to its original direction.
Hiding The Path
When you're done positioning your text and you're happy with the results, hide the path in the document by selecting any layer other than your Blazon layer in the Layers panel. In my case, my certificate only has two layers—the Type layer and the Groundwork layer that holds my epitome—and then I'll click on the Background layer to select information technology:

Select whatsoever layer other than the Type layer to hibernate the path in the document.
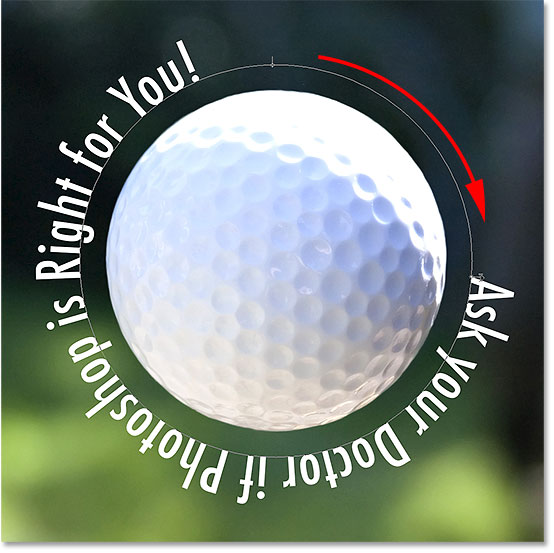
With my path at present hidden and the text flipped back over to its original side, here'southward my final result:
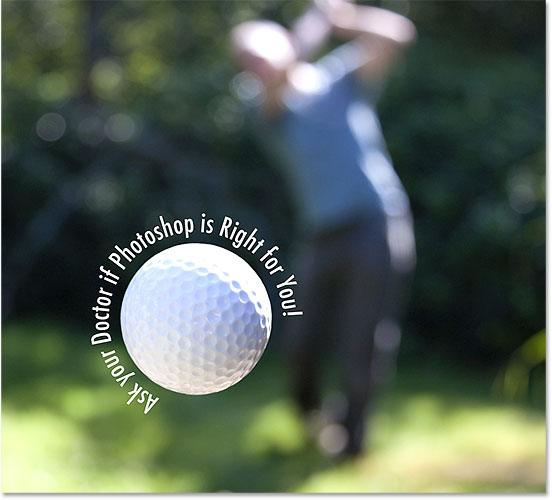
The final effect.
Keep in mind that even though we've added the type to a path, Photoshop has not done anything fancy with the text itself. Information technology's still just text, which means you can become back at any time and edit it, or completely modify it if you need to. You lot can choose a different font, change its size or color, adjust the leading, kerning or tracking, the baseline shift, and annihilation else you can do with regular type!
Other Stuff
© 2022 Photoshop Essentials.com.
For inspiration, non duplication.
Site design by Steve Patterson.
Photoshop is a trademark of Adobe Systems Inc.

Source: https://www.photoshopessentials.com/basics/type-on-a-path/
Posted by: aokiafteptips.blogspot.com
0 Response to "How To Draw On A Path In Photoshop"
Post a Comment